Installation of Steeroids in a 1977 Corvette C3
Are you tired of the leaky steering control valve and/or steering cylinder on
your Corvette? Are you tired of the 40+ year technology of your C3's
steering system. One of the nicest upgrades that you can do for yourself
and your car is to convert your original steering system to a modern rack and
pinion system. This conversion is much easier than you think. While
there are a couple of different kits available to do this, I went with a
Steeroids kit. SpeedDirect have been continually upgrading these kits
with stronger brackets and components and they stand behind their product.
The kit includes all the components that you will need. The kit is much
lighter than the original components so your car will experience a weight loss
which is always good. The step by step instructions from SpeedDirect are
excellent and with any mechanical abilities at all, you will be able to install
this kit.
The first step is to remove the old steering system. The only component
that you will reuse is the power steering pump. It should be noted here
that the C3 power steering pump produces about 1300 psi and the Steeroids rack
unit likes about 1000 psi.
The extra
pressure can lead to excessive response and touchy Steering.
Borgeson offers a pressure reduction kit
#899001 that allows you to adjust the internal bypass pressure of the P/S pump.
I did not install this kit and I am happy with the steering response. If
you decide to install the pressure reducing kit here is a
link to the install.
Removing the old steering
system is relatively easy. I basically dropped all my steering linkage in
one piece. I disconnected the power steering hoses from the pump (2
hoses), the pitman arm from the sector shaft (puller required), dropped the two
tie rods at the wheels (pickle fork required), disconnected the idler arm from
the frame (2 bolts) and dropped the steering cylinder bracket (4 nuts).
You can now fold the old assembly up and pack it in the box your Steeroids kit
came in. The only thing left to remove is the old steering box.
Remove the top bolt that holds the 'rag joint' to the steering column shaft.
If this is an original bolt, you will need a 12 point socket. You can
separate the clamp with a heavy screw driver to make it easier to slide off the
spline. Remove the bolts securing the steering box to the frame and
carefully pull the box forward off the spline and down.
As I have already mentioned, the Steeroid instructions are excellent. I am
not going to quote all their instructions here. However, I am going to
cover the basic installation procedure and I will throw in a couple of tips that
may make your life easier. Before you start, make sure you check that all
your hardware and bolts came with the kit. Check and make sure you have
left and right threaded link joints (1 of each) and left and right threaded tie
rods (1 of each). I had 2 left link joints. A quick call to
SpeedDirect had the correct joint on its way.
Before you start, make sure you clean up the spline on your steering shaft.
Also, this is a good time to check the lower bearing in your steering column for
excess play. If there is any play in it at all, I recommend you replace
the bearing. The bearing is inexpensive and an easy 10 minute replacement
at this point. You might also want to clean up the areas around the old
steering box and also the area around the old idler arm as you will be
installing brackets in these areas.
You are now ready to start. The most important thing in the installation
is to pay attention to torque specifications and use Loctite when instructed to
do so. I assure you a sloppy installation will not work and remember, this
is your steering system that you are playing with and your safety depends on it
working properly. After a few miles on your new setup, you are going to
recheck all your work just to make sure everything is secure.
You will be installing the brackets first. It does not matter which side
you start with. Make sure you follow the instructions and check the
diagrams to ensure you are installing the bolts in the correct direction.
Once both brackets are installed you are ready to install the rack. Make
sure you have installed the steel plate on the rack, with the washers between
the plate and the rack and that the plate is orientated properly (link joint
connections on top). Don't forget the French lock under those two mounting
bolts. You will notice that the spline on the pinion comes very close to
the left motor mount support. However, this is deceiving and after the
rack is clamped to the brackets, there will be sufficient room.
The next step is probably the more time consuming one and probably the most
critical as it needs to be done correctly. That step involves the
installation of the universal joint connection system between your steering
shaft and the pinion on the rack. There are two things here that you can
do that will make your life a lot easier. You should determine the
midpoint of the rack and you can do that by turning the pinion until it locks up
in one direction, turn it back until it locks in the opposite direction while
counting the revolutions of the pinion. Once you know the number of
revolutions lock to lock, divide that figure by two and then turn the pinion
back until you are at your calculated half way point. The second thing you
need to do is make sure your steering wheel is centered. If your steering
wheel has a locking column, that will come in very handy to maintain centering.
To verify that your steering wheel is in the centered position, just check to
ensure the flat spot on the end of your steering shaft spline is on the top when
you are looking down on it.
Having completed the centering procedure will ensure that your signal light cams
will operate correctly and your wheel alignment will go more smoothly. You
are now ready to install the universal assembly. The ends of the joints
are different so you will not get them on backwards. The joint for the
steering shaft has the flat side and is the double joint. You can slide
that one on. Install the support joint very loosely making sure you have
one nut threaded on before you put that joint through the hole in the support
bracket. Put the lock washer and other nut on the back side of the joint
but do not tighten it. You can now push the double splined rod through the
support joint and into the double universal joint. Push the other
universal joint on the bottom spline and now orientate the joint so that you can
drop it over the spline of the pinion on the rack. You may need to push
the support joint into the bracket in order to get sufficient clearance, but you
will eventually find a right combination. Now that you have the joints
installed, you can tighten the bottom joint using the set screws and nut
locks provided. You can also tighten the other locks as well, although you
may be adjusting those later. Semi-tighten the nuts on the rod support.
(Note: With some installs, there is a
clearance issue between the motor mount support and the rack splined joint.
It may be necessary to grind off some of the mount support. Be sure and
check this closely).
You are now ready to check for any binding in the universal joints. It is
critical that you have a smooth rotation through 360 degrees of your steering
wheel motion. If you have any tight spots, follow the Steeroids procedure
for correcting the problem. In most cases, moving the double joint down on
the steering column spline will resolve any tightness. Once you have this
resolved, tighten all set screws and the support rod nuts. Recheck your
steering to ensure that it is still smooth.
You now only have a couple of things left to do. Install the two link
joints on the rack. Make sure you put the correct threaded link joints at
the location specified in your instructions. Use loctite when instructed
to do so. Ensure your rack is still centered and install the tie rod
joints to the adjusting rods. Make sure you have equal thread on both the
link joint and tie rods. With your front wheels running as straight as
possible, install the tie rods. You will notice some spacers that came
with them. Read the documentation that came with your kit. These
spacers are used to change the angle of your linkage to compensate for what is
called 'bump steer'. I adjusted the angle on mine so that the rods are
parallel to the ground when the weight of the car is on the wheels. I have
no problems whatsoever with this setting.
The final step involves the installation of the power steering hoses. Make
sure you have the 'o' rings on the fittings that connect to the rack. You
might want to leave all connections loose until you have all hoses connected and
orientated where they will not come in contact with other moving parts.
Once you are happy with the fitment, tighten all connections. Before you
crawl out from under the car to add fluid to the power steering pump, recheck
all your bolts and nuts to ensure you have not overlooked anything. Add
the fluid and bleed the rack by following the Steeroid instructions.
Congratulations! You are now ready for a test drive. I think you
will agree that this setup is a major, major improvement over the original
setup. On a final note, if you consider the cost of replacing the original
steering components on your car versus investing in a rack and pinion kit, the
benefits of the kit will far out weigh the small difference in costs.
Below, you will see some pictures of my install and most are self explanatory.
I now have had my kit installed for a year and I have had no issues with it
whatsoever.
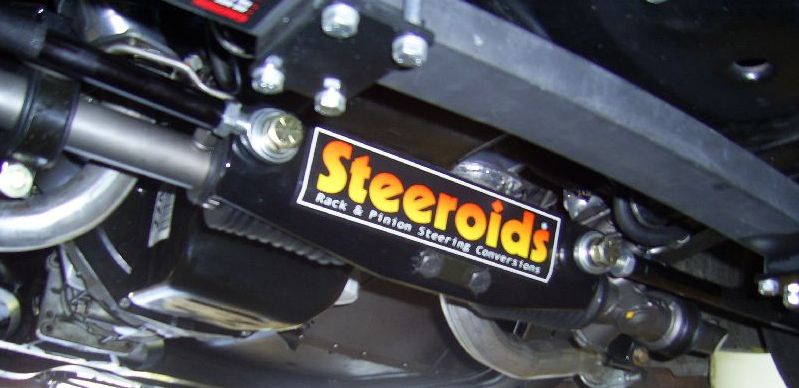
The completed installation
Looking down on the universal joint setup between the steering column shaft and
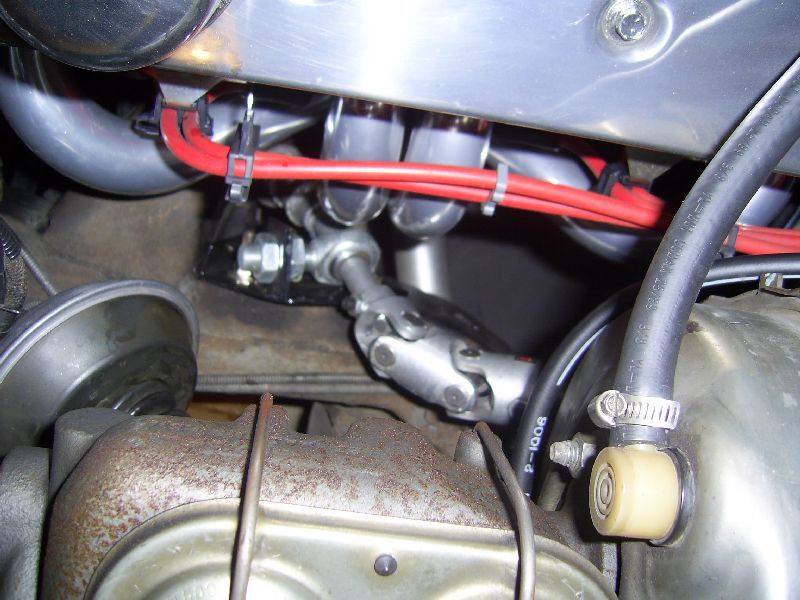
rack.
Looking up on the universal joint setup between the steering column shaft and
rack.
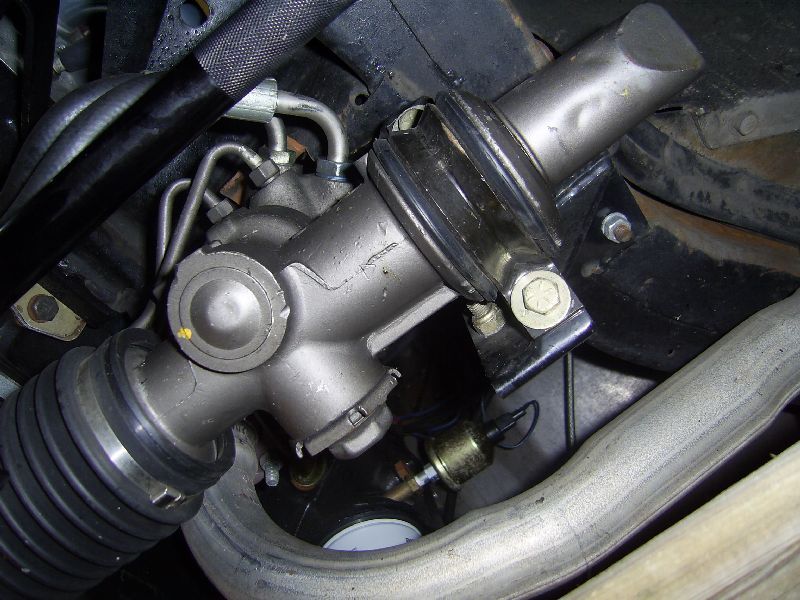
Driver side view from under the rack and bracket
Passenger side view from under the rack and bracket
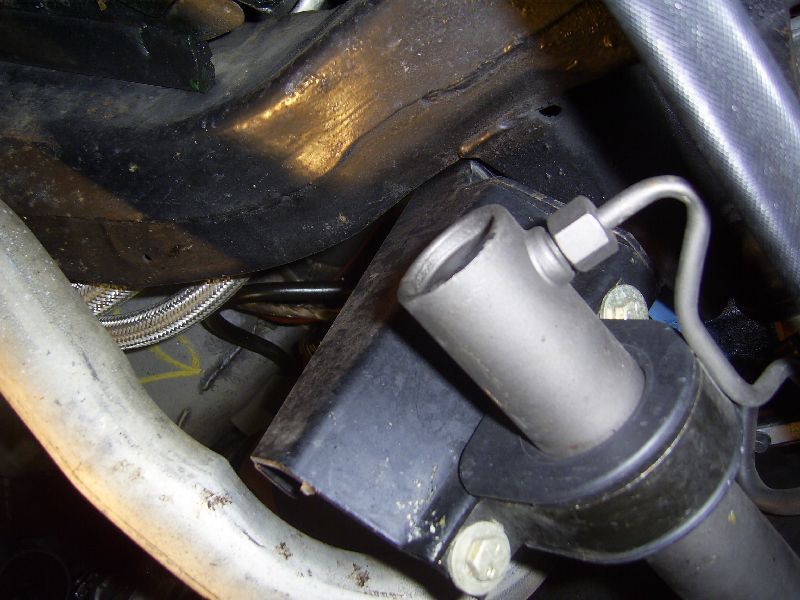
Driver side view behind rack where universal joint connects to the pinion
Passenger side view of bracket bolted to frame where idler arm was previously
bolted
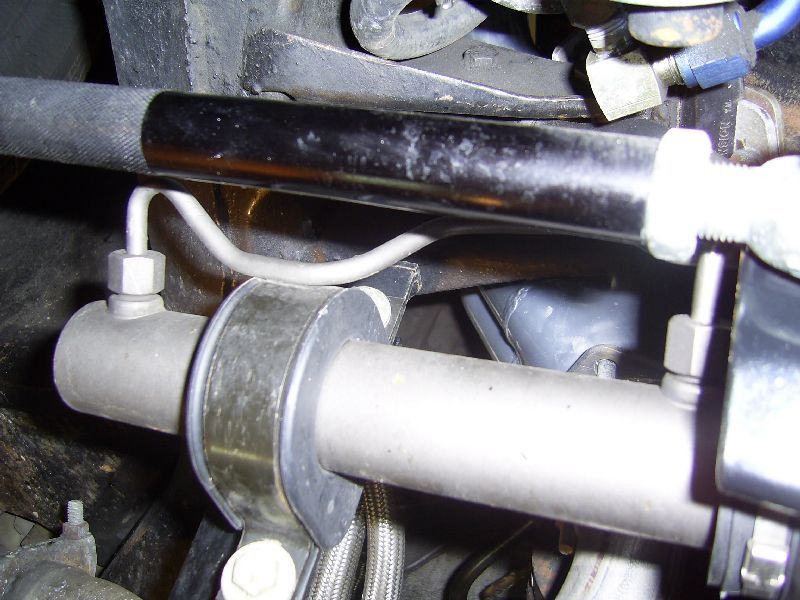
Driver side view of tie rod and link connection, notice spacers between tie rod
and spindle arm
Another view of passenger side bracket looking front on